
Library Card Files - recycled for STORAGE in my sewing studio.

Stored in the first four drawers of the library card files are the items I use the most: scissors, seam rippers, hem guides, machine needles, tools, and thread.
Easy reach.

BEFORE PHOTO
Rough, but Ready to Convert
In the fall of 2010 - Jon and I were looking for library card files for my studio. Our neighbor offered 2 used-vintage credenzas of library card files with a total of 120 drawers. What a jackpot! And a chance to make them into built in units for storage.

My Mom Lorraine visited me September 2010 and she and I started on the card file project.
Mom removed brass pulls from the 120 drawers and hand cleaned each one with fine steel wool. She buffed the brass pulls only slightly--clean to the touch, just enough to remove surface dirt.

While Mom cleaned brass pulls from the drawers, I started working on the two credenzas.

One of two library card file credenzas with its 60 drawers pulled out.
Each slot you see here has three stacked drawers. I hand sanded and primed the unit with black primer. The project took two weeks.
I removed the legs, and unbolted the four boxes to finish sanding and priming.
Each slot you see here has three stacked drawers. I hand sanded and primed the unit with black primer. The project took two weeks.
I removed the legs, and unbolted the four boxes to finish sanding and priming.

Pictured above are 40 of the 120 wood faced drawers.
Sanded, Primed, and Painted two coats black satin finish.

Mom's work cleaning the brass pulls was PERFECT.
I was able to sand most of the alligator varnish finish off the wooden drawer fronts, primedand repainted black. The drawers are 17" long, 5 inches wide.

I labeled each drawer

Threads sorted by color. I got acquainted again with all the threads I purchased over the years.
Oh My!

Since then, I've USED UP, and ACCUMULATED more thread.
Different threads for different machines and applications: 1) General Purpose Thread for piecing quilts, clothing, purses. 2) Serger Thread (larger spools) for overcasting fabric (edge finishing) to build clothing. 3) Thread for Embroidery Machine. 4) Not Pictured are Long Arm Quilting Thread and Crochet Thread/Pearl Cotton Thread for Hand Embroidery Work.

Things that don't fit inside the converted library card files--I store in a vintage four drawer oak file cabinet. Things like: stabilizers for the embroidery machine, interfacing for clothing, wool roving and topping. Which reminds me of other things stored in those drawers that I need to pitch.

The curtain panels are ivory cotton/polyester shirred on tension rods. I made curtain panels for each of the seven windows, but only ended up using one curtain. I move the curtain from one window to another--to block the sun which sometimes makes sewing difficult.
Having my studio on the second floor, the windows are a cinema view of deer and their fawns, turkeys and their gosslings moving across the expansive yard. The view and sunlight makes me happy.
The curtain also becomes storage for colorful clips I use while making fabric rope baskets.

Adding a new strip of fabric takes just a dab of stick glue to join the end of one strip to a new strip. Lots of fussing to keep walls straight. Learning curve--definitely.

Decorated with my hand formed polymer clay buttons. I like making my own buttons and beads for purses and rope baskets.

As I wind the fabric around the cotton clothesline rope, I secure the wind with a plastic clip, and then sew about 6-8 inches as I sew round and round. It takes a whole day, and a hundred feet of clothesline to make a fabric rope basket. They are really cool looking.

I added twine and beads to the perimeter for decoration and stabilizing an extra wide rim.


My studio is the second story (800 sq. ft.) over the two stall garage and woodworking shop. Built in September 2009, Jon made the building to look like a grain elevator--and we painted it Barn Red.
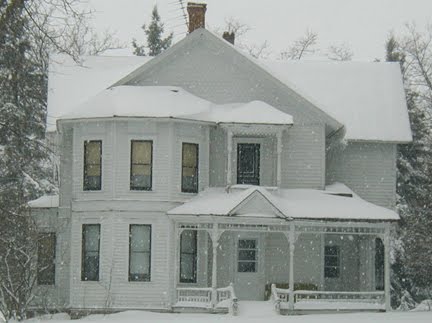
I sewed many years in my basement with the spiders at our old place. When we moved to the Victorian, I sewed at the dining room table.
For thirty years I stored all my notions in boxes, and wasted hours looking for this tool, or that color of thread, and where did I put the buttons, or the zippers? I lost/misplaced things over and over again. I re-purchased lost/misplaced sewing notions all the time.

Having a big studio where there are labeled drawers is a dream come true.
Getting organized doesn't come overnight. It was a process for sure. In this photo I just dumped the zippers into the drawers as I was moving into the studio. Later, I sorted all the zippers by color and labeled each drawer. Organization is a blessing.
As a little person, I remember Grandpa Bert telling me many times, "a place for everything, and everything in its place." Seemed like a lot of words to remember back then, but easy to remember Grandpa's smile forever.
Grandpa also told me, "the early bird gets the worm." I was tickled to find a big sign for the wall in my studio. I keep it right in front of me at the long arm quilting machine. I see him and smile each time I see the sign. Sometimes I start my day in the studio at 4 or 5 a.m. I'm an Early Bird.

"Navy Blues Quilt" - May 2016
***
SHE'S ALIVE: The sewing studio comes alive!

PATIENCE
Patience is the name of the game. I finished restoring the library card files in the fall of 2010. Two years later, my studio space was just a big room, waiting for flooring and finish carpentry. Above are the finished card files sitting in the middle of the unfinished studio space.
***
In January 2012 Jon started to transforming the studio into a real sewing space, and turning the credenza boxes and drawers into multi task storage units.

FINISHED:
Jon created bases and cubbies for the converted library card files shown here at the north end of my studio.
I use table extended with leaves for a long layout/cutting table.

Notice the high 4" deep shelf Jon installed around the perimeter of the studio? This is one of the most important features of the studio. We used this same feature in the upstairs bathroom in the house.
In later photos you'll see the studio railings hold spools of serger thread, long arm quilting thread, and crochet thread for hand embroidery. The spools of colorful threads are artwork for the walls, and color inspiration for projects.


Jon is a genius to make bases for the card files, lifting the drawer off the floor, and turning these storage units into good looking furniture.

With the new floor installed, Jon goes to work building the cubbies.
He is very good about checking with me to make sure my STUFF fits. The cubbies are built to store bolts of fabric, and therefore Jon built the cubbies about 6 inches taller than the standard fabric bolt. Makes it convenient to access and put away fabric bolts.
I drew picture of what I wanted for this north wall and he built it perfectly including wide cleats underneath to support a countertop.


View of Studio--looking south
I didn't overthink lighting, but was sure to find lights that have swivel features. I figured if needed, I could beam some of the lights toward the ceiling or walls if it were too much. I didn't hesitate when I saw these fixtures, and caught them on sale to boot!

Jon added three ceiling fans for seasonal comfort. So glad he did this.


