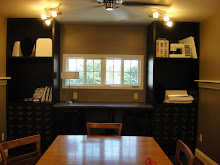
Sometimes I finish turning the binding and hand stitching quilts in my red dining room.
I can leave my day's sewing mess behind in the studio and join Jon as he watches the television in the adjacent living room. While I stitch--occasionally I hear Jon laugh out loud. He's a jewel you know. Treats me like a queen. Supports me on my busy quilt work, and never fusses about me getting dinner on the table late, or calling him during the day and asking him to bring pizza because I stayed too long in the studio.
I didn't finish the hand stitching on Saturday night (I was tired), but I got up early Sunday morning and sewed three sides (turned binding and hand stitched). I took some photos of the dining room to share with you.
I'm gonna back up one step, and show you my studio where Saturday I sewed the binding to the quilt.
If you saw an aerial view of my second floor studio--it is shaped like a cross. The north to south view is 12 ft. wide by 40ft. long, and then two east and west wings were added. The west wing is a sewing suite, and the east wing is (red in the face) f-a-b-r-i-c storage. The garage/workshop/studio was built in the fall of 2009. Three years ago we painted the building red. I like red.
If you zoom this photo--way in the back you can see some of my collection of vintage sewing machines that I restored. Want to see one up close?
1950's Universal Model MIN
Above photo - I was dismantling Tension Disc Assembly, polishing away the crud and oxidation.
I always take a photo when dismantling assemblies--this is the most important part of learning how to clean, oil, and restore any sewing machine (being able to put it back together again).
My lovely Universal MIN turquoise green and ivory 1950's sewing machine--was manufactured by the Happy Sewing Machine Company in Japan. There is a casting stamp on the bottom of the machine that says HAPPY. And golly I was HAPPY to see that stamp. Lots of blingy chrome--that looks pink in this photograph because I was wearing a bright pink shirt.
The good news, bad news. I bought it for $30 and cost of gas to drive to an auction house in Wausau. It cleaned up beautifully, but the take up spring was partially broken so I took it to Dave in Princeton (Mr. Wizard) and he replaced the take up spring which was major surgery to install on this Japanese machine, but is a simple no brainer on many other older machines we've restored. The repair cost me $52 plus gas (4 hours driving time).
No accessories were included when I purchased this machine--and I learned it was a left needle position machine much later. I did some research and ordered special offset presser foot for straight stitching from Ed in Maryland. Learning about left needle position in early zig zag Japanese machines was an eye opener and I discovered three other vintage Japanese machines I'd acquired where also left needle position machine. As technology improved, the left needle position machines disappeared.
Jon replaced rewired the dry crumbling cord and electrical plug to the motor. However, in the end the original motor in its beautiful turquoise green housing was arcing and Jon told me that wasn't good (dangerous even).
I had 2 electric motor shops look over the motor to give me the bad news that it couldn't be repaired. Reluctantly I replaced it with a new standard black motor w/new foot control and the set up looked ugly--a black motor on that pretty green machine.
After 30 minute test run with the new black motor--the cheap foot control overheated and died. I contacted Ed in Maryland and he solved my problem totally--he fixed me up with a vintage ivory color sewing machine motor, and I added a vintage foot control and universal block.
There was a problem with the sewing machine's two ivory buttons (lower right) that control up and down settings of the feed dogs (normal sewing, versus darning). And a minor problem with needle bar/stop motion screw when winding a bobbin. These problems were solved with more deep cleaning as these areas were just sticky.
The last hair on my head was gone after a small part fell off of the machine and I couldn't figure out where it came from. I photographed the part and emailed Ed from Maryland. Ed got me back on track.
These machines were well made, and to my surprise I'm learning that most problems can be fixed with serious deep cleaning. Things/parts get stuck with all kinds of gunk: ear-waxy nicotine from smoke, old sticky sewing machine oil residue, thread nests, lint, and the blackest dirt on earth.
When my friends and I get together to work on old sewing machines, someones always says--OMG this is the dirtiest machine I've ever worked on. Most often Jerry says this.
As Jerry starts cleaning a new acquisition, I know he's going to say "this is the dirtiest machine I've ever worked on." And if he doesn't say it, I ask him, "well Jerry, is this the dirtiest machine you've ever worked on?" And then he starts to laugh.
Finally, I have everything I need to sew beautifully on my thoroughly cleaned, oiled, restored vintage Japanese, Universal turquoise green and ivory, chrome bling sewing machine, but with considerably more money invested than the original $30.
OK, ok . . . back to my story about finishing the Cheese Platter quilt.
Saturday in the Studio--sewing 400 inches of binding on the quilt.
Turning binding to the backing and hand stitching.
In the background you can see some other restored machines . . .
This 1880s Remington No. 5 was covered with a hundred years of dirt and rust.
My friend Jerry did the cleaning, oiling, adjustments. My husband Jon repaired the blistered walnut veneer and cleaned rust off the iron treadle assembly and repainted it black satin. I did the research on the sewing machine/rifle manufacturer history and found an old advertisement identifying it as a No. 5.
I found period reproduction hand pulls, and had a machine shop fabricate the missing leaf tension spring. Jon re-glued the wood pitman (the arm that spins the wheel on the treadle). To protect the dining room floor, I put down area rugs that Jerry makes. Aren't they beautiful rugs?
You can read more about restoring the Remington No. 5--found in our 120 year old barn and who it belonged to:
In the other corner of the dining room is a 1920s, Singer Model 115 with Tiffany (a.k.a. Gingerbread) decals. It was purchased as a treadle and converted to a hand crank. Jon built the box base. Jerry did the cleaning and oiling. I'm cleaning the bobbin assembly (almost done) which is dismantled in the labeled plastic bag on the right. A missing throat plate slide and bobbin case were replaced with vintage Singer parts. Now this machine runs perfectly, making a soft chuga-chuga sound.
This Singer Model 115 was manufactured in Elizabeth New Jersey, production date April 1920. 5,000 units were made during that production run. Its tension disc assembly is mounted on the (left) front end and is not shown in the angle of this photo.
The Singer Model 115 is sitting on top of a fancy treadle cabinet that holds another beautifully restored Singer Model 27 manufactured in May 1905. Jerry cleaned this vibrating shuttle 1905 sewing machine whistle clean.
I learned how to treadle last year. At first, I was terrible. Couldn't get it started right using my feet. Then Jerry told me what I was doing wrong. The start/stop motion doesn't begin with the foot on the treadle--it begins with the hand on the balance wheel to start and stop sewing.
Remember the old saying, get the ball rolling? Well, that's exactly what it takes to get the hang of treadling. First, put your hand on top of the balance wheel and with a downward motion get the wheel spinning and then begin treadling with your foot to keep it spinning. To stop sewing, put your hand on the balance wheel to stop the spin. And never, ever let the balance wheel rotate in the opposite direction or your bobbin thread will become a tangled mess and you'll have to stop and fix it. Treadling is so cool.
There are treadlers (people) who actually do free motion quilting. I gotta try that for sure.
Alabaster statue purchased 30 years ago at Adeline's Antiques here in Scandinavia, WI. It is signed, but I've never been able to find any information about the sculptor.
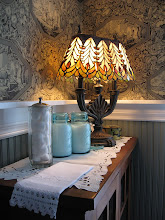
Tiffany style lamp--Jon bought for me, Christmas 2008 I think.
Today, I'll finish this quilt and set it aside to be sold this summer at a show.
Unless, unless you want to buy it?
***
Postscript: My apologies to 20 followers I lost in one day (January 29th) due to Goggle's decision to block visitors who don't have Google Accounts. Every Google Blogger Lost A Number of Followers This Week.
I am so sorry if this happen to you.
Google Blogger left an announcement about this in the Design/Settings/Manage section of our blog. They called the change, "streamlining."
Wow--I am sorry.
If you are not too insulted, will you sign up for a Google Account? I'd love to have you all back again.
***
Also on January 29th, Photobucket bombed. And all my blog photos were blank except for the first photo which I always use the Google preferred Picasa Photo Storage for the first photo so both the title w/photo appear in other blogs friends' favorites list.
I had no idea my Photobucket blog photos were blank until a kind visitor left me a note alerting me of the problem. Thank you again Cindi M for writing to me.
Fortunately, Photobucket got the problem fixed.
What a terrible week for visitors, followers, and bloggers.







.jpg)


