Pages

Tuesday, February 28, 2012

Back to 1951

1951Chevy


In the photo below, left hand side, you can see Jumping Jack Flash up against the back wall (figure with orange shirt and black bib overhauls--a yard sculpture Jon and I made.  


Below is how Jack Flash looked when I had him on display at our former property years ago.
After the welding was done I couldn't figure out how to get his trousers on him because of the shaping of his legs.  I had to cut open the inseams, install the overhauls, and sit under him with a needle and thread and sew his pants! 

Getting back to the photos of the 1951 Chevy . . .


The running boards, fenders, etc. all there.  But, a lot of work . . .

Love that V shaped window.  Got a squeegee?

Friday, February 17, 2012

HELP - Getting Organized in the Art Studio/Sewing Room

I picked up some little baskets at the dollar store to organize spools of sewing machine thread. 

My luck seems to hold out.  I purchased 21 baskets, and that's what it took to organize the sewing machine spools.  But wait, there's more. . .

The serger thread (cones). 
The larger standing thread cones are for the serger machine.

What is a serger machine?

Well, this is what a serger does . . .

A serger sews overcast stitches.  Here is an example of fabric serged edge.  Some fabrics like satin begin to unravel with even marginal handling. Serged fabric stops the ravel. 
Then, there are four additional cases of embroidery thread that have different properties.  The weight is different--it is a stronger thread and in most cases has a lovely sheen.


I boxed up all of the general purpose sewing machine thread in a plastic crate and fashioned some cotton piping cord into a handle.  This helped me haul the thread up to the studio.  Surprise . . . I'm still climbing an aluminum ladder to get to the second story art studio/sewing room.  The elevator is not up and running yet.  It takes some balance to climb the ladder and haul things up to the studio at the same time.


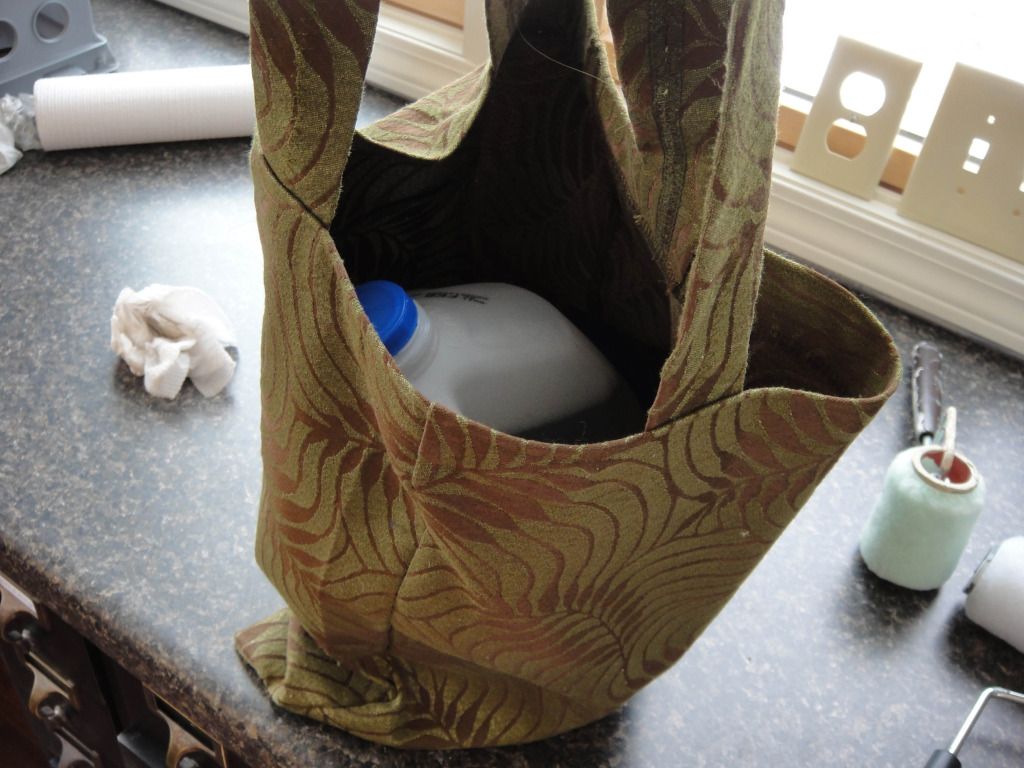
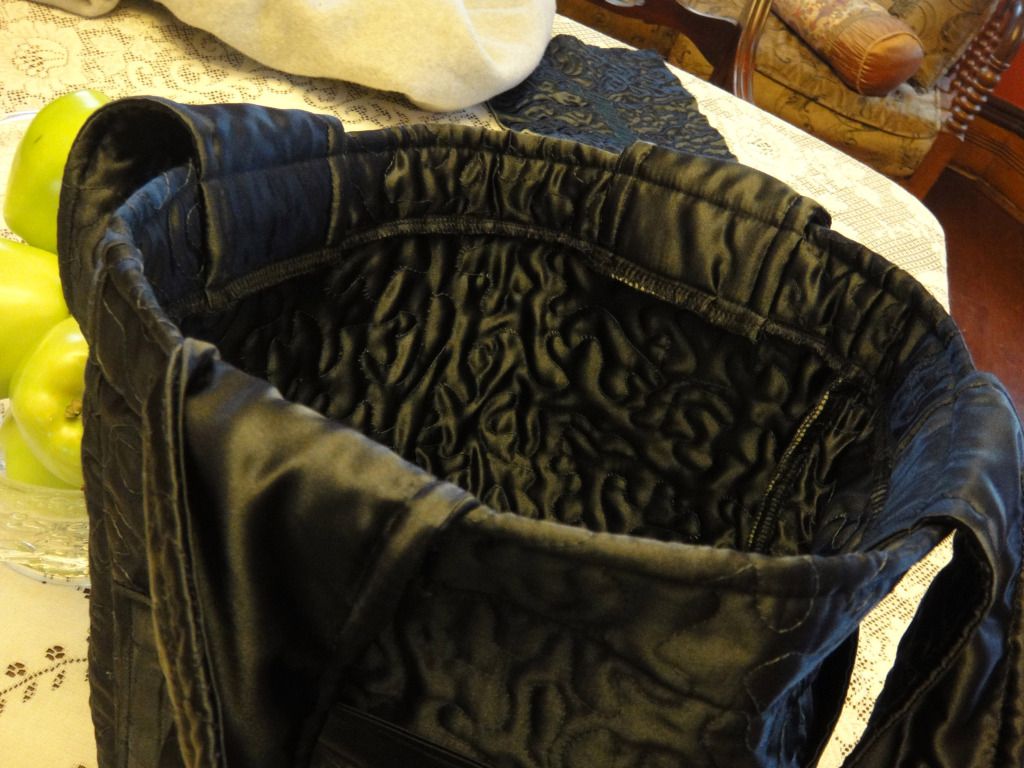
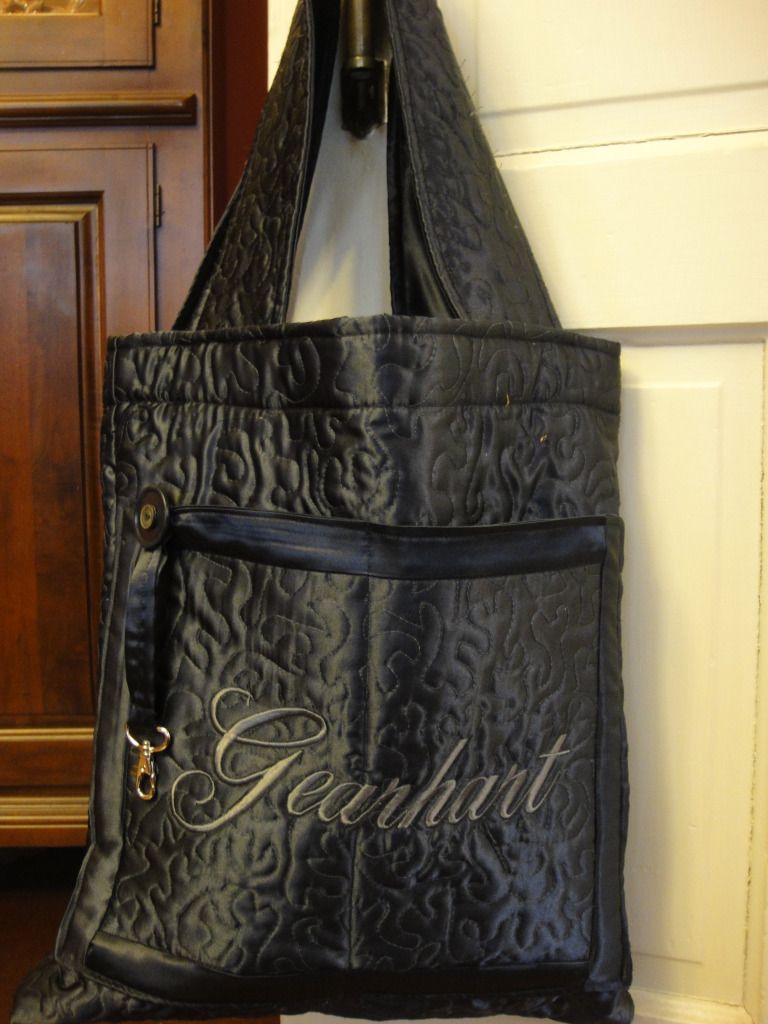
Here's how I haul hot soapy water up the aluminum ladder to the studio.  I made myself a sturdy tote out of outdoor furniture fabric.  I put the straps around my neck and climb up the ladder.  I need water in the studio for clean up while I'm up there putting things away and finishing the painting job.


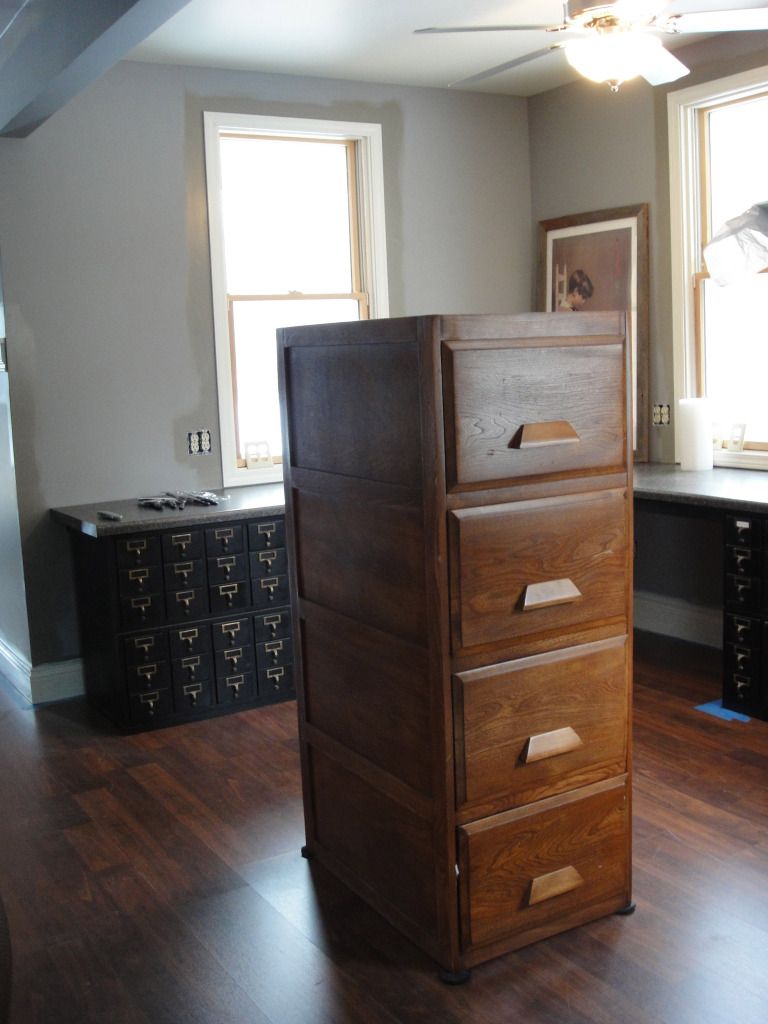
This is the west dormer, my new sewing space in the upstairs art studio.  I shoved the wooden file cabinet to the center of the space so I could start cutting in the wall color.  Notice the little wool cookies at the base of the file cabinet help me move it across the floor without damage.

In the background you can see the library card files where I put away the spools of thread.


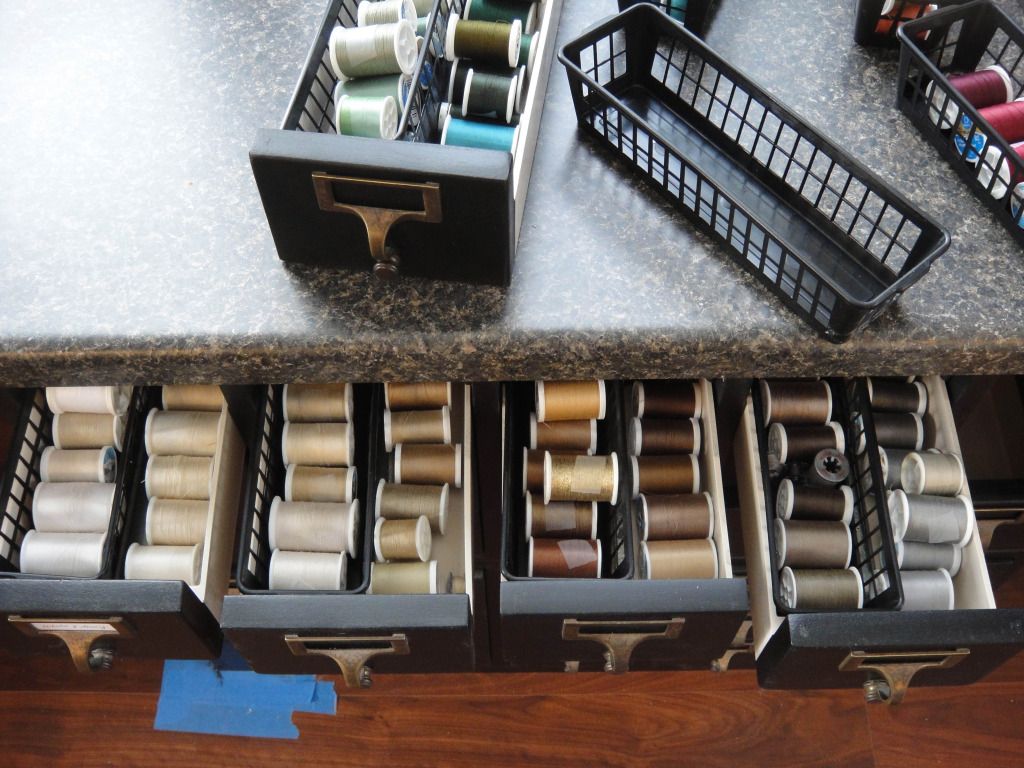
12 drawers to put away 200 spools of general purpose sewing machine thread.  That could change; I could downsize a bit more, but thought it might be wise to use only 2/3rds of the drawer, to open the drawer without dropping the entire drawer.  The drawers have no "built in stop", so for now I'll just play with the quantity of items to store versus "drawer function". 


Next, I put away 8 drawer of zippers, arranged by color.  I like to sew purses and totes with built-in zippered pockets.  I use lots and lots of zippers.  Mom gave me her stash of zippers recently, so I quickly doubled the amount I already accumulated over the last 40 plus years. 

I sewed more than 60 purses this year.  20 or so I gave to cousins last summer at a family wedding.  Another 20 went to my Mom for her church bizzare.  Two dozen went to two stores for sale, and some for Christmas presents to friends.  I love to sew them--its addictive.

Here is where I left off in the studio (re-painting the wall project)


Looking north, at the art supplies area.  The canvas cubbies are installed and painted.  Still have ladders and too much stuff in the way.  Later, I promise it will look good without all the clutter.


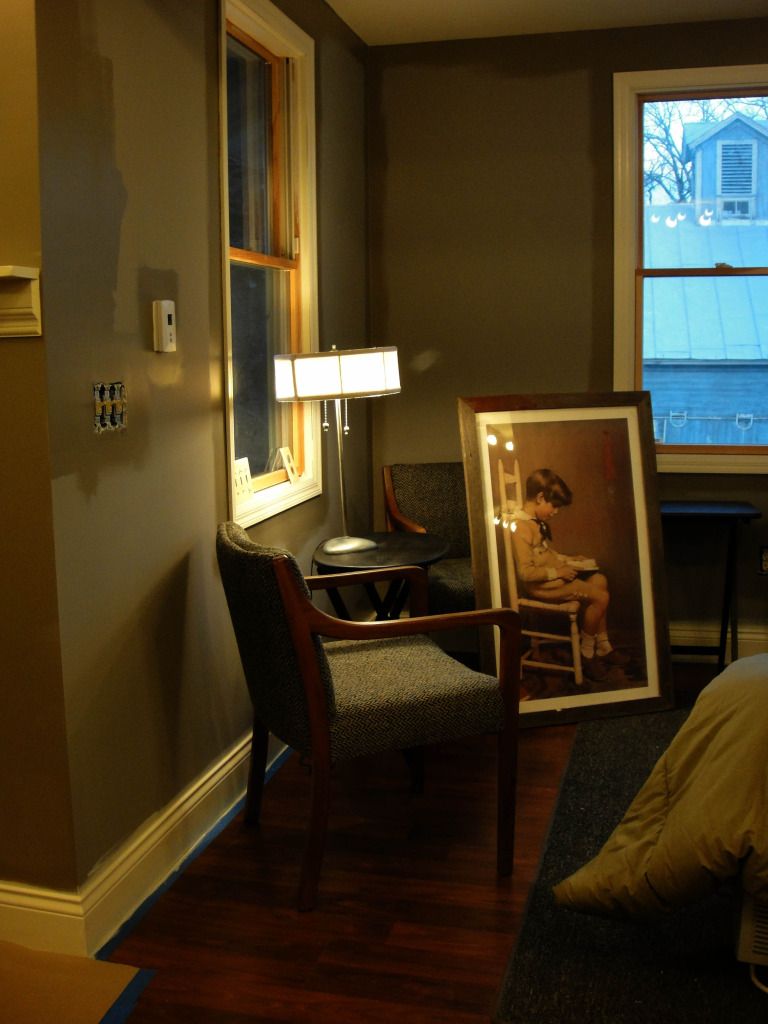
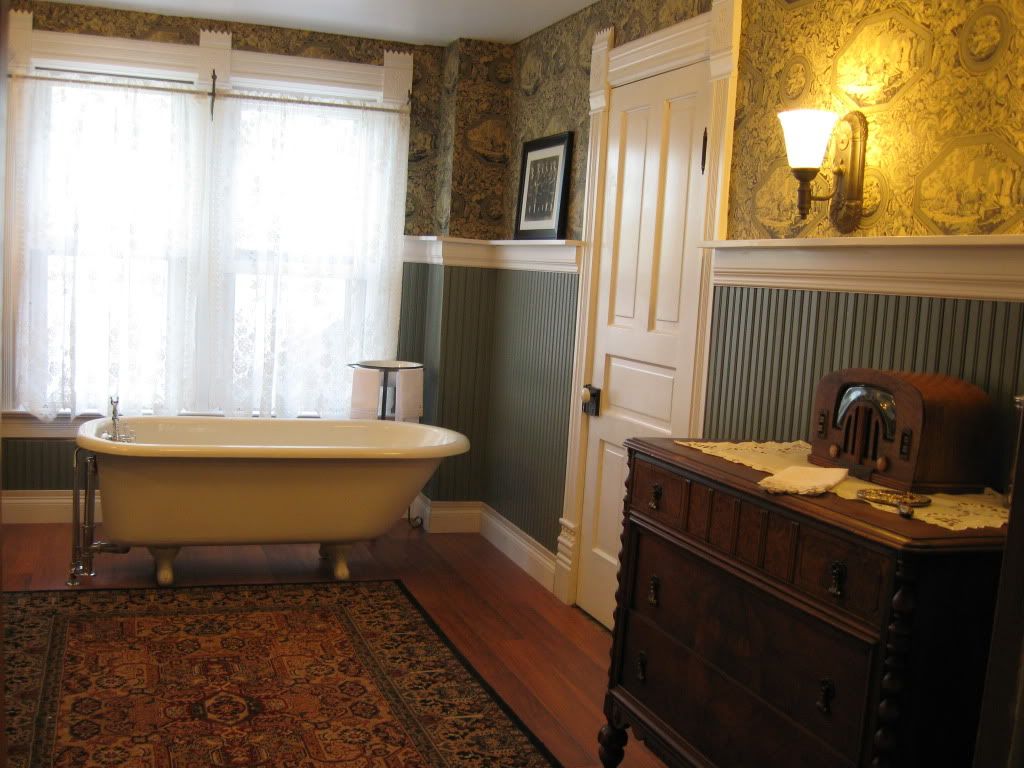
Seating area, across from the elevator door in the east dormer.  I imagined these two chair sitting here since I found them at a yard sale for $5 and brought the stinky chairs home, deconstructing and reupholstered them.  They were my first upholstery project. 

You can see there is a slight difference in wall color (where the old blue gray is slowly covered up with the new "washable" brown gray satin paint). 

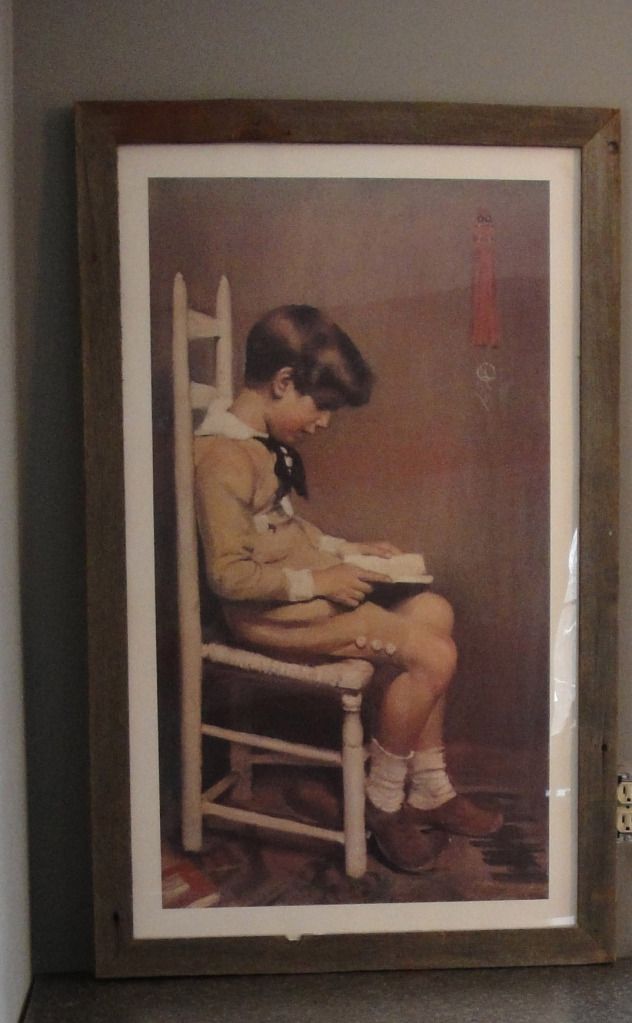
The print is a favorite of mine.  I don't know the artist.  I picked up the print at a boutique.  For you costume afficionados--can you tell me what year do you think this little boy is dressed?  I really would like to know more.  Counting on you to tell me.


Wednesday, February 15, 2012

Stippling - A Little Wiggle Room

My First Attempts at Sewing Machine Stippling

Ok, drop your feed dogs.  You're under arrest.

On my bucket list of things to do is "learning how to stipple" (free motion quilting).

The steps are:
  • Drop your feed dogs on the sewing machine
  • Install quilting foot
  • Start with new needle!
  • Set machine tension to 2
  • Make practice squares (three layers of fabric)
  • Sew the wiggle (looks like puzzle pieces or brain matter?)
I made some quilted fabric out of Navy Blue Satin with Polar Fleece for batting.  

I cut oversized pieces of:

Top layer - satin
Middle layer - polar fleece
Bottom layer - satin

Polar fleece used for batting (middle layer)

You can see the sewing machine stippling binds (quilts) all three layers together.

So far, the project looked like I had imagined it would.  I put the stippled fabric in the machine embroidery hoop, and embroidered Gearhart--my dear friends Janet and Jerry's last name.

Left is a swatch of the satin, and to the right the polar fleece, and in the center the pocket panel for a fancy tote bag for Janet and Jerry Gearhart. 

Guess what?  I didn't like the embroidery thread color, so I started over.  I was practicing, so why not?

Yes, this is better.  A little more contrast using silver embroidery thread.

I mailed this bag on Monday and with any luck, on Wednesday Janet and Jerry will have their quilted tote bag.  I added a key fob and double button (my trademark--a double button).

Opened, it holds quite a bit.

Message to Janet and Jerry--there will be some super soft polar fleece bags coming your way too for the interior of this bag.  Thought it might be used to carry around your handpainted porcelain pieces when you go to shows.  I had such a great time attending your CAPA (porcelain artists) convention and was so proud to see you both receive such wonderful tributes from your peers. 


Monday, February 13, 2012

The Parlor and Other Stuff

This room was originally the parlor.  There is a side door inside the room that leads to the foyer.

We acquired the house in April 2007.  A year later we had restored the house enough so that we could live there full time.  

You can't imagine what we went through that first year just to get the house up to a level of occupancy.  There was no water, and chimney mortar was wicking rain into the house--and brought the dining room ceiling to the floor.  And the list went on and on.  Roof repairs, 60 amp electric service like two kite strings, entrance steps and porches decayed so bad it was dangerous to walk on them.  Crumbling and Dangerous are the best words to describe the house when we bought it.  There was no insulation, and a vintage gas furnace


We have three bedrooms upstairs and this one downstairs.  To the left is a Sheboygan secretary.  Visible in the faded mirror I can read Chicago 1903.  I paid $250 for the desk, and two months later saw one just like it in a Princeton antiques shop for $1695.  Our Sheboygan desk has a key to lock it.


Here's the parlor sans wallpaper,  after insulation was blown in the walls, and repair the wall cracks--two skim coats of joint compound, sanded smooth, Zinzer 123 primer, and finally two coats of wall color Bewitch by Valspar.  I used the color Bewitch again  a year later on the 3/4" beadboad in the new upstairs bathroom.


Paint color--Bewitch by Valspar; 3/4" bathroom beadboard.


To me, the color Bewitch is the new black; a great neutral color, Bewitch goes with everything.


Bedroom Air Conditioner


I collect signs. Thought you'd enjoy this one.


I'm finishing this post tonight, featuring one of my oil paintings. 
Pauline and Dean Jaansen's antique Nipon vase, painted 25 years ago.  I have photographs of this painting showing stages of the work in progress.  At one point only the vase was painted--it looked like it was floating in the air on the canvas.  Truth is, I was so scared about handling the vase; I painted it first, then returned it to the family.  If I dig around and find the photo of the floating Nipon vase, I'll post it.  Its a real hoot. 

Saturday, February 11, 2012

New Driveway for Our Old Victorian


I'm sharing these photos from last September when we regraded and resurfaced the driveway at our Victorian House.  I'm standing in the street out front.  You can see we have a large front yard.

In this photo--to the left of the house is an old lilac, that covers up the view of the two story garage/woodworkingshop/art studio.

I moved my camera position to the bottom of the driveway.  2011 was the second season for new trees. 

 We kept the older leaning tree for the time being as it provides some shade relief for the new trees.  A year or two from now we'll eliminate the leaning tree. 


We are so grateful to our neighbor--a good friend for re-grading the driveway.  He has some impressive equipment.  


After the regrading was finished, he brought in the compactor.  The compactor made the entire house rattle including the old windows.  So much so, several pictures fell off the downstairs bedroom dresser, and the kitchen clock crashed to the floor. 

Then three semi loads of crushed recycled asphalt arrived, and our neighbor used his tractor with grating equipment to spread the crushed asphalt.  The last step was the return of the compactor--vibrating every antique window in the house.  The compactor work took about 30 minutes.

The result is amazing.  (Sorry, I didn't take a finished photo).  The crushed recycled asphalt is a smooth durable surface and is quite nice looking.  Now there is plenty of room in front of the new garage to turn around--making a complete circle and allowing for extra parking.

The crushed asphalt cost about $1500, and our landscape contractor friend's work was a gift to us.  And quite a generous gift it was--for in fact he spent the better part of his week working on our driveway.   He saved us thousands of dollars on this project.  He and hs wife are wonderful people.  There must be a hundred ways to say wonderful and they are all of them!


I scrubbed the front porch, new steps, and concrete, getting ready to paint the steps.  Ooops, I must have been side tracked to do something else; I never got the steps painted. 

I do remember spending an hour now and then some afternoons rocking on the porch last summer--gosh I sure miss those warm days.  When I look at these photos of the lawn I think about the hours and hours of lawn mowing we do.  We have six acres.

----------------------------------

I worked in the art studio this week. 

Finished two coats on the woodwork, and now doing the cut-in painting of the walls. 
What?  Repainting the walls????  Yep.

I decided to change to a gray with brown under tones. 

My other reason for repainting?  Because the previous paint was eggshell finish and wasn't washable. 
When I tried to wipe off the grime of construction it left the wall surface looking burnished. 

The new color is a satin finish and is washable. 

I'm very satisfied with the new wall color and will share photos very soon.