

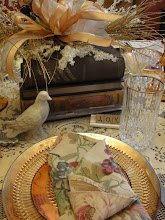
I finished this Tangerine flavored queen size quilt. It was sitting in the studio for a month. I confess, I made the backing twice because the first backing offered little contrast. The second backing was much better. I photographed the quilt on the Stearns and Foster mattress in the north bedroom downstairs. It is such a comfortable bed--and a great place to take a nap.

There are lots of long arm quilters like me who "float" their quilts. This means the backing is rolled snug between the take up roller and the belly bar, while the batting and top are draped and smoothed by hand. Clamps at the right and left margins provide tension during quilting.

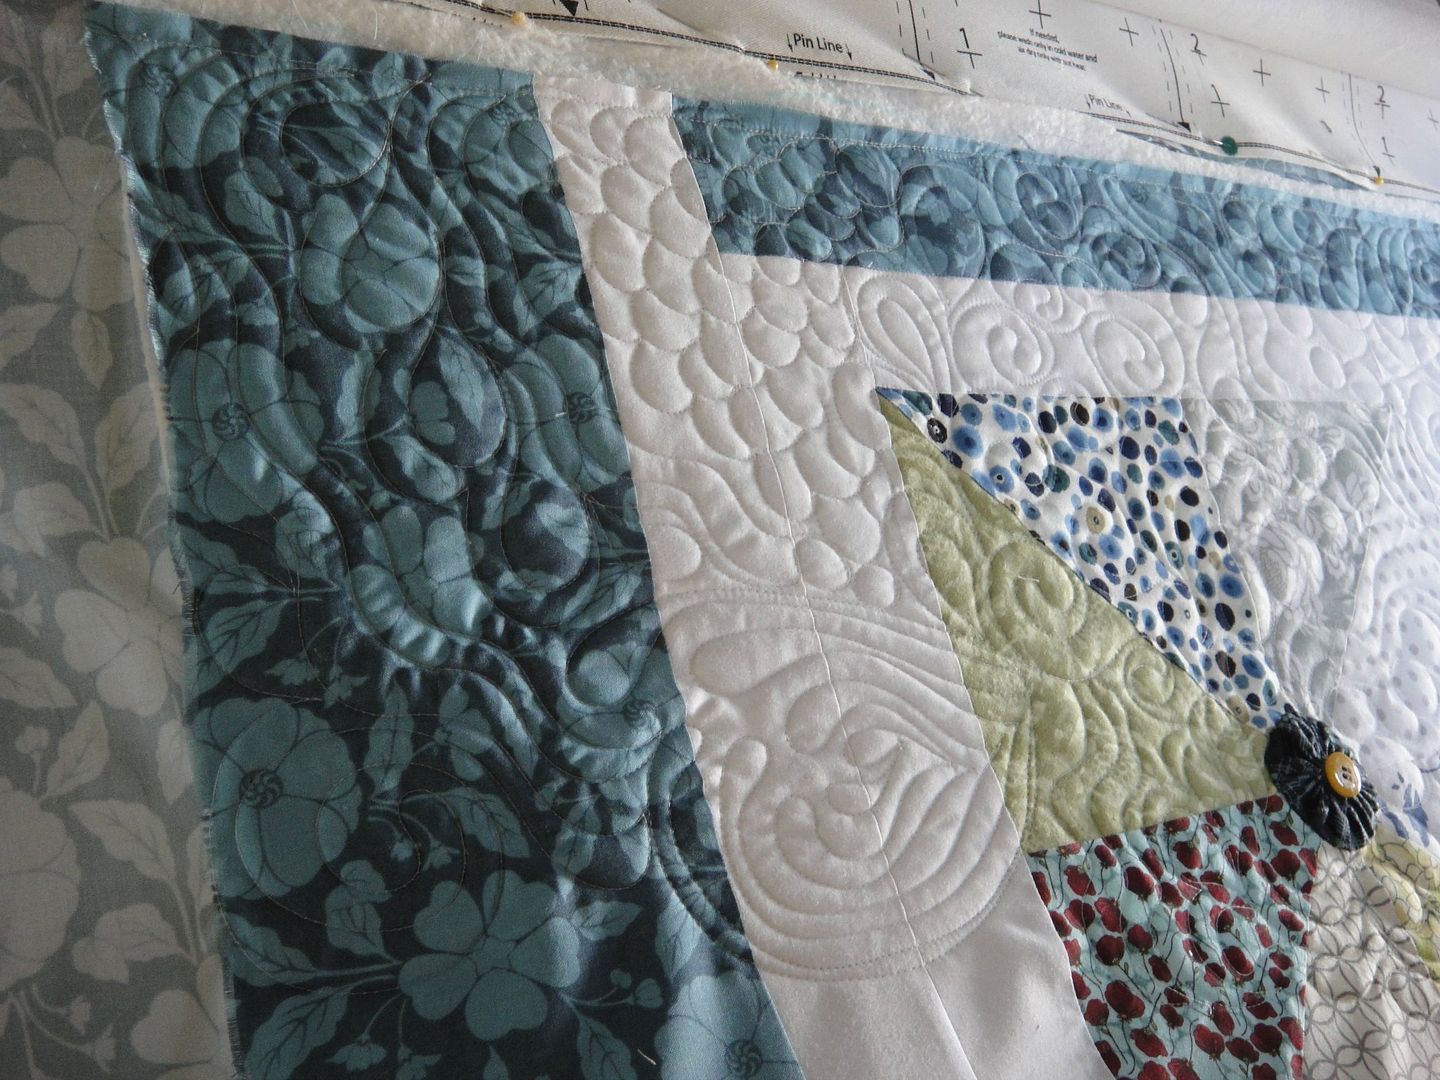
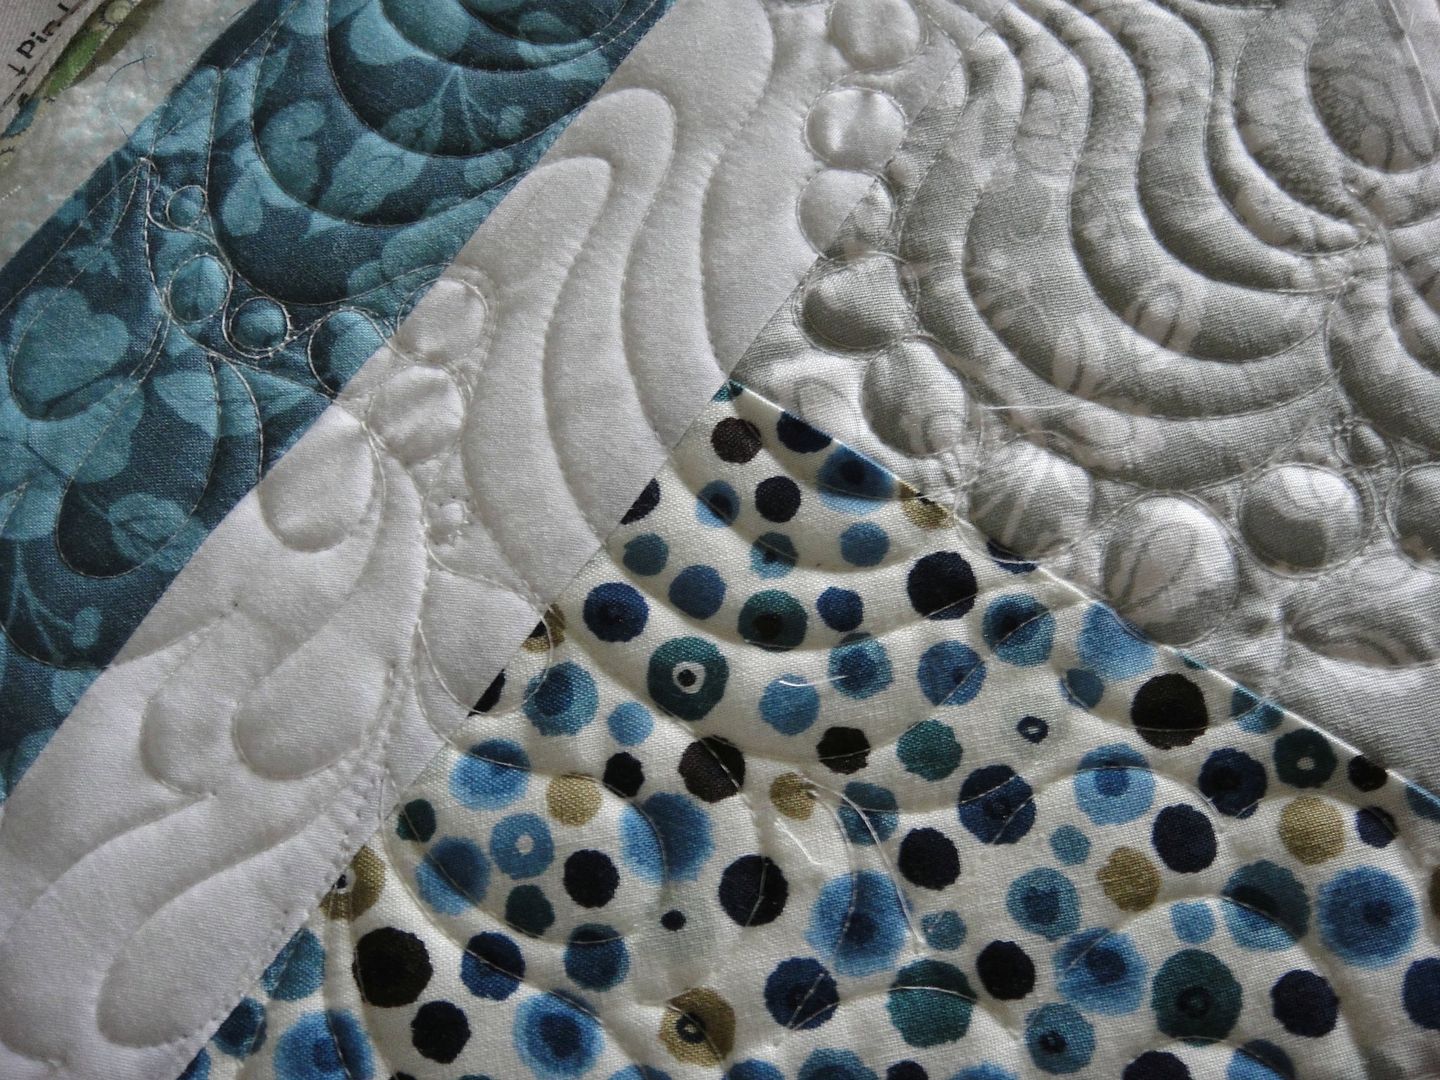
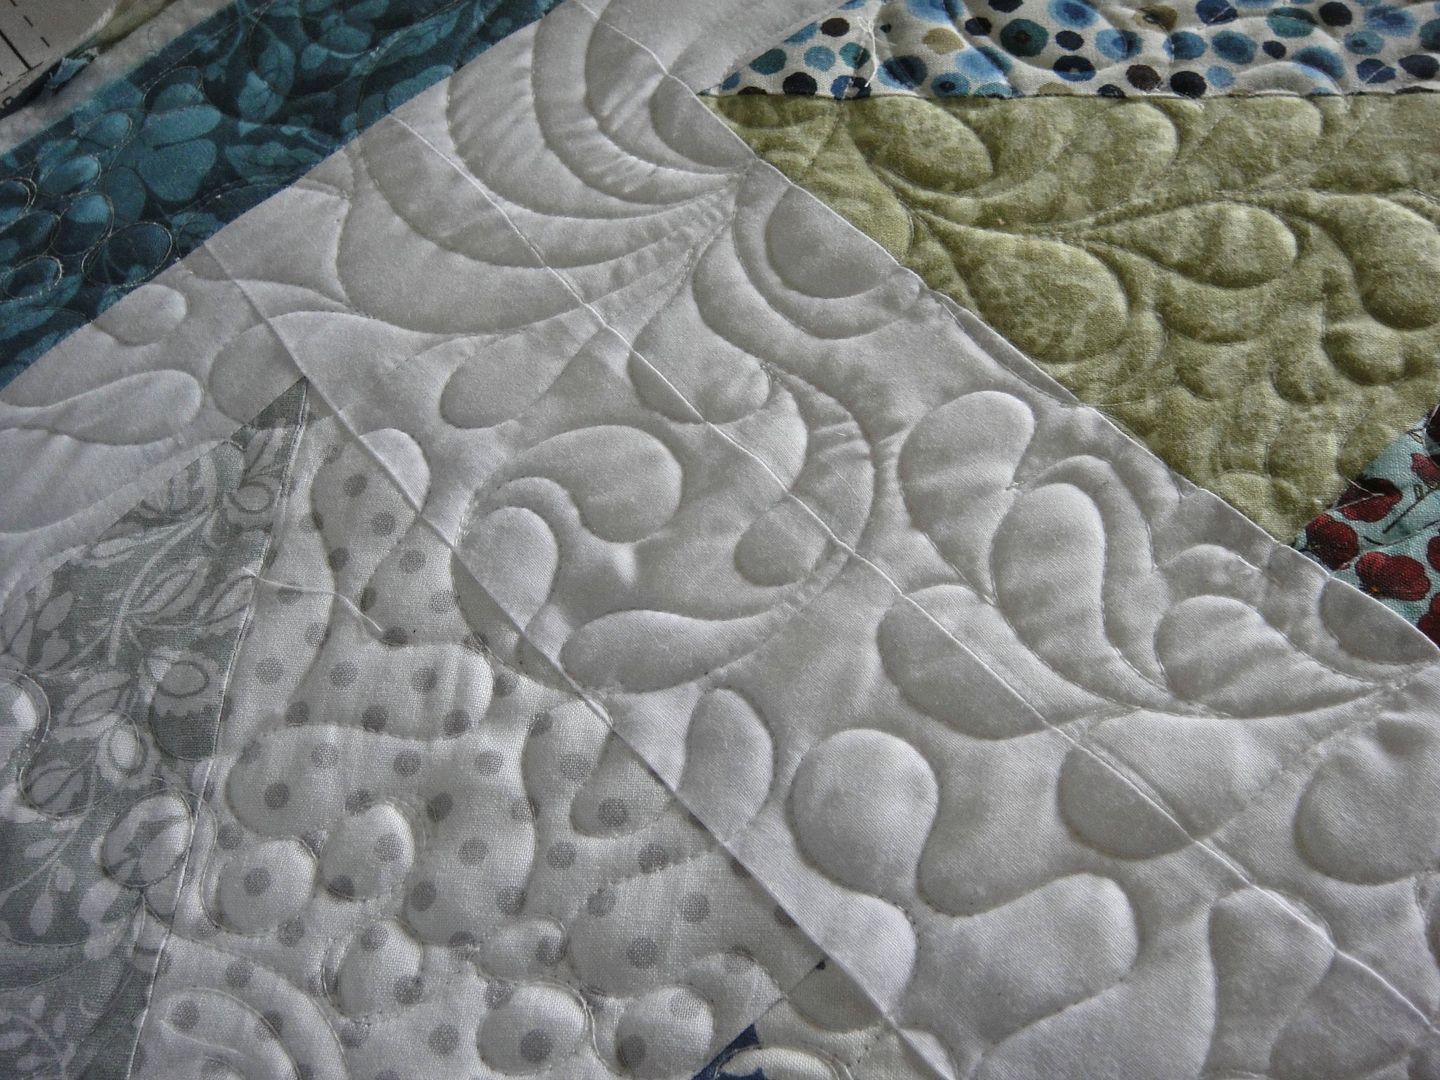
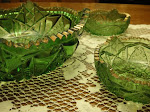
Close Up of Feather Bouquet design.
After stitching "S" spine I back track with feathers on one side of the stem--then back track again adding feathers to the other side of the stem.
I created the Feather Bouquet design on a whiteboard with dry erase markers. The size of the design sequence 8" high by 12" wide is based on the size of my whiteboard. I spend hours developing a continuous line sequence, and more hours repeating the design until I develop the muscle memory for great spacing and fluid motion.
My expectations are stitching 3 queen size quilts using the same design sequence. After that, I'm ready to go on to a new design.
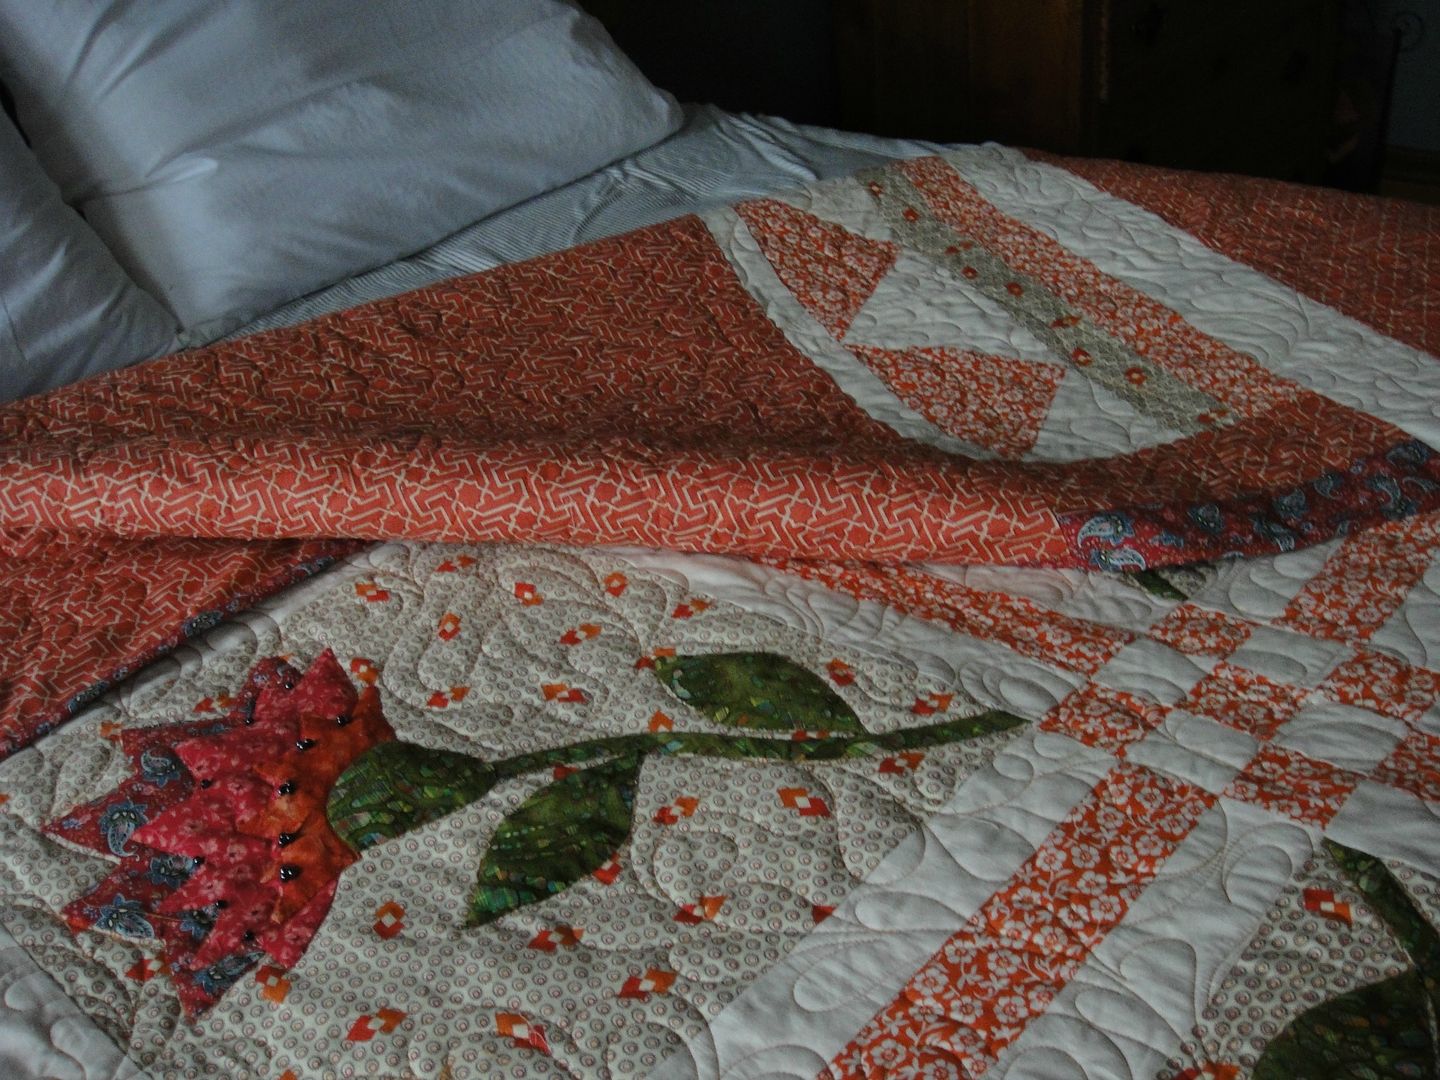
The hand stitched appliqued flowers and glass beads remind me of the orange and yellow Fritillaria Imperialis we grew at our former house and yard on Elm Valley Road.


I always insert a panel to add interest to the backing fabric.
Repeating fabric from the quilt top onto the backing not only looks good, it adds and overall 10" or more width, providing a minimum of 4" extra backing material at the left and right margins while long arm quilting on the frame.
The extra 4" of backing material at the left and right margins is where I use side tension clamps to keep the backing fabric snug, smooth.
Three quilts are finished now with the Feather Bouquet Design: 1) Scrappy Quilt with Turquoise and Orange Corner Stones, 2) Earth Tones-Framed Nine Patch, 3) Orange Fritillaria Quilt (above).
***
My next project is the Blues Yo Yo queen size quilt, and features my random long arm quilt designs based on Zentangle. And, I am inspired by Karlee Porter's new book "Graffiti Quilting, A Simple Guide to Complex Design."

Blues Yo Yo is another variation of scrappy quilts I love to make. Identical blocks were built from eight different fabrics.
A simple technique: Begin with 10.5 squares of two companion fabrics, right sides together. Sew 1/4" around the perimeter, press with heavy spray starch. Cut twice diagonally. Press open half square triangles. The finished block is framed in white cotton, and decorated with a variety of fabric scraps hand sewn into yo-yo(s) with buttons.
Heavy Spray Starch keeps fraying edges (strings) at bay. The crisp fabric is easier to cut, sew, and best of all--the spray starch keeps biased cuts from warping out of shape.

On the frame, ready to begin the long arm quilting.


The long arm quilting fun begins!
These next photos are random doodles, using my best continuous line short designs learned from Zentangle examples in books, and valuable live demonstrations on YouTube.

Crossing over lines is inevitable, especially when I consider all the rules, and breaking of rules I make up as I go along. This is "where" and "how" I learn to graffiti quilt--by just getting in there and doing it.
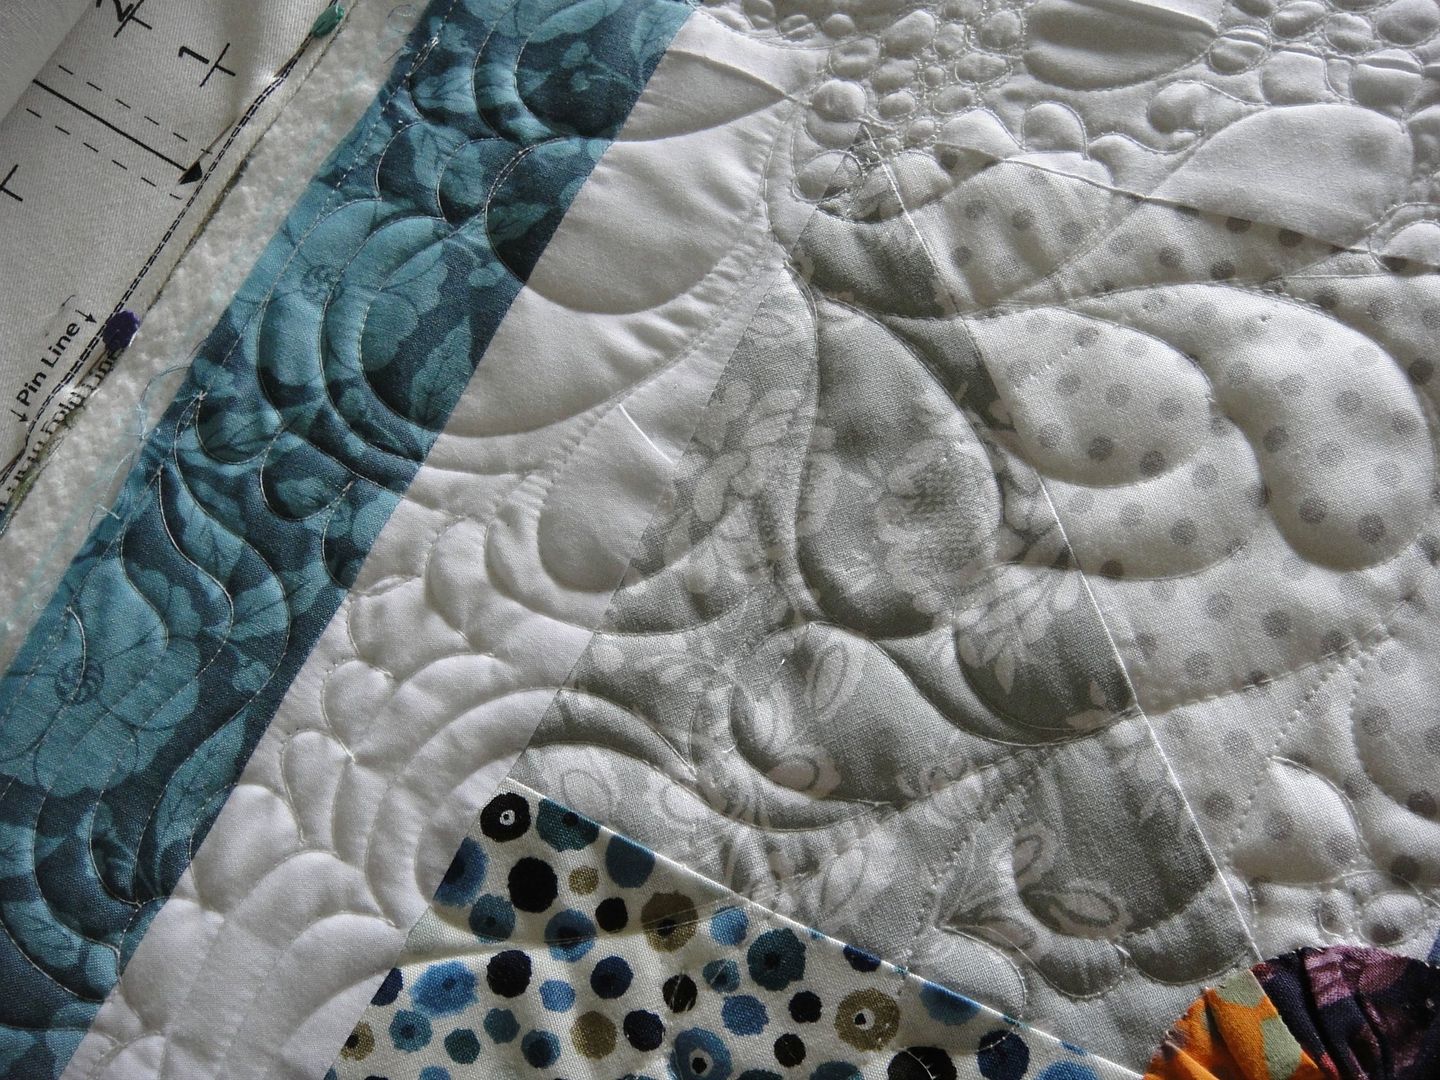
There are some rules I follow when planning quilts. In this quilt I want the watery blues and greens to ride along with lots of light/white fabrics. I did this on purpose so I could use white quilt thread and the result is the quilting design is readily seen in the dark and light fabrics.
Notice how the middle tone fabrics hide the quilt designs? Yeah, and its tough seeing where the heck I'm stitching in those middle tones.
Next year I know I'll groan a bit, looking back at my first attempts at random quilt doodle. But, I'll be glad that I tried something new.. Right now my mission is to discover the good, bad, and ugly, and improve. I'll be showcasing my favorite doodles on future quilts. And, the doodles that weren't so great--I'll find a way to improve them. For the moment I'm feeling excitement.

Hurray for corners on quilts!!! I always start at the top right corner of the quilting frame doing edge to edge free style work. Above you can see I started out with a bang. Maybe too much bang, eh? As I moved away from the corner I relaxed more--allowing a bit more spacing. The good news, the corner of the quilt will be draped on a bed, near the floor. Hurray for corners!!!
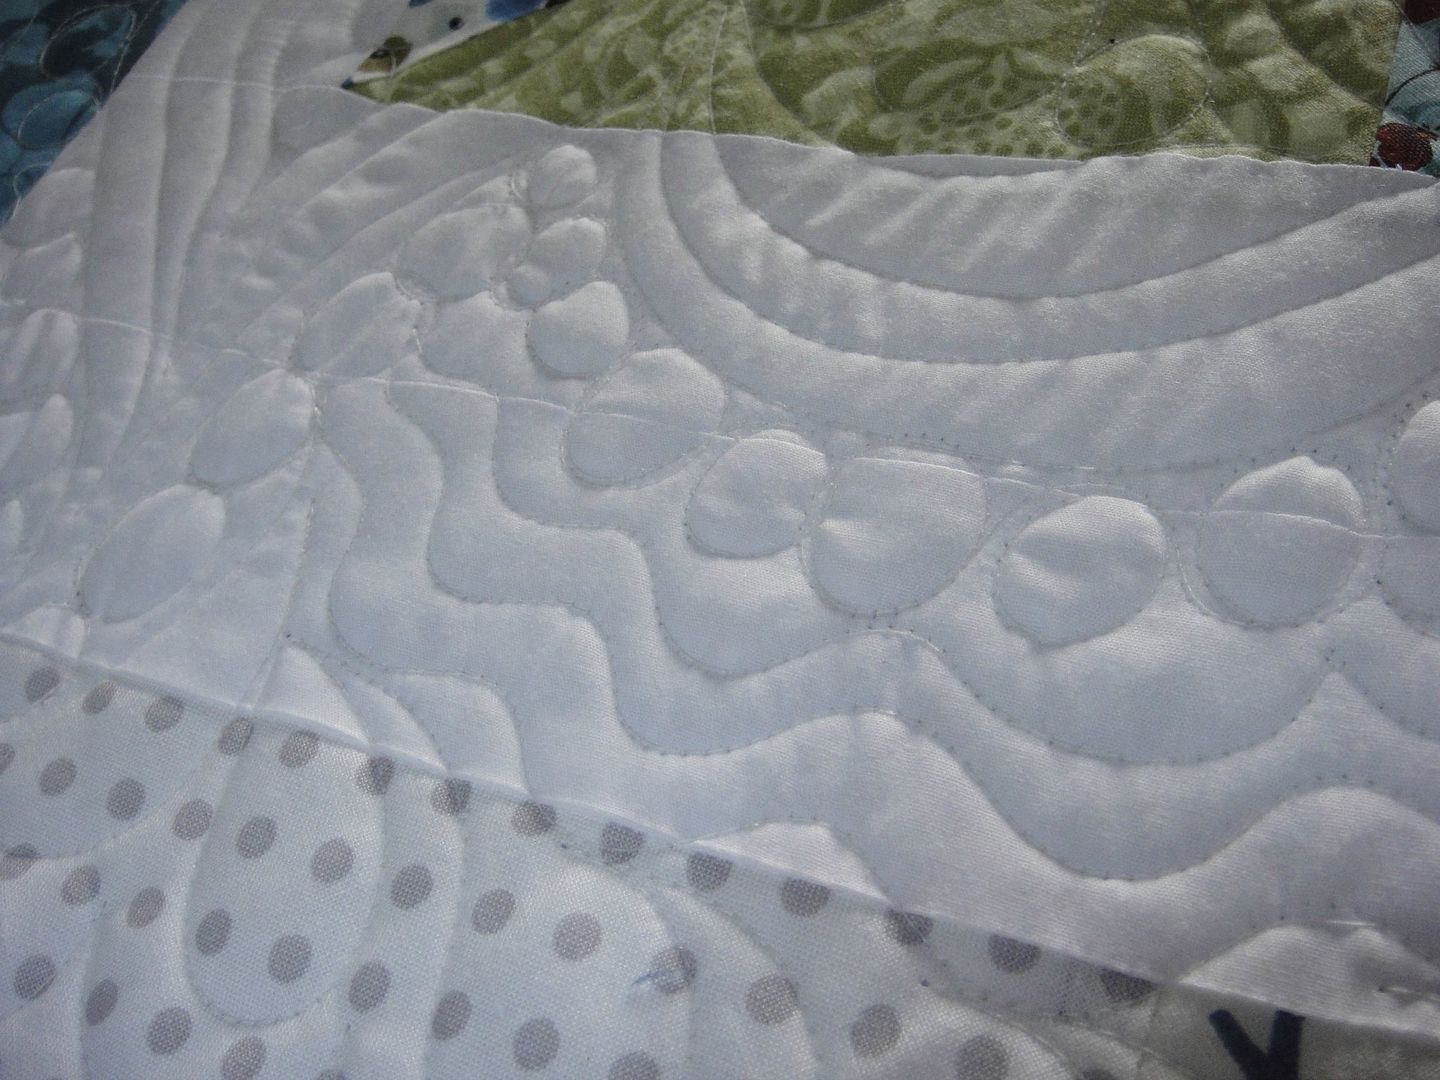
As I quilted away from the corner I introduced some McTavishing (curvy worm like echoed lines), and worked out some strategies for small designs to spin around the yo-yo. I could have played it safe and not added the yo yo (s) until the quilting was done. But for me, I needed to add those important elements to fulfill my vision of what the quilt would become.

When in doubt of my next move, I added my free style Feather Bouquet design with it's elegant "S" stem and feathers.
Also, I feathered off of the pebbles following the rim of McTavishing echoed lines. Ooooo, I like. I'll have to remember this combo. Glad I took these detail photos for future reference.
Yep, those Feathers/Pebbles/McTavishing are cool.

No time to get frightened over a missed spot--I recovered quickly with a large meander to maintain airy spacing.
I see in these photos--there are orphan threads clinging here and there--where the heck did they come from?

Upper right hand side--a big pointy leaf with many echoes, and outlined with pebbles. I pray, my pebbles one day will be great. The skill takes time. But I'm really pumped about learning how to do them.
Random doodles colliding, good spacing. I'm happy with the first row of quilting. Not a bad start.
***
I have a weird leftover fabric for the binding picked out. I'll save it for a surprise when I post photos of the finished quilt on the bed. And, I think you'll enjoy the pieced backing I made for this quilt--so different!


.jpg)


Hello from Kansas!
ReplyDeleteYour quilts are gorgeous!!!
Always a treat to visit your pleasant home.
Blessings,
d
All of these quilt shots look marvelous! Thank you for being brave and showing your process. Maybe one day I'll be as good as you are already.
ReplyDeleteHello Deanna. Thanks for your note about my quilts. Nice to see your smiling face. Love your photo, gal.
ReplyDeleteHi Elaine. I'm looking forward to visiting you at your website and seeing what you are doing this beautiful month of May. Thank you for leaving me a note about my quilts. Always wonderful to hear from you.
ReplyDeleteI've read every word you wrote and still I have no idea what you said. All I see is a beautiful quilt. I love to see your color designs. Color combinations can be dull or exciting, and you seem to make every one exciting. That's sure a natural gift/talent. Love seeing all you do. (Maybe you should set that easel up on a corner....I love your paitings!!!) Proud of all your quilting growth.
ReplyDeleteHi Gearhart. It is always a pleasure to hear from you. We are three amigos forever: Beverly, You, and Me. I should dig up photos of us and publish it on my website--especially the photo of us three (1983) where we were in silly costumes and crashed Buck Paulson's class. We laughed and laughed and laughed. I love all the photos from that trip. We were half the age we are now. Weren't we the most beautiful people back then?
ReplyDeleteI have a longarm very much like yours and I love it. I had to comment because I love your work and I especially love the title of this post -- it summarizes my daily thoughts exactly!
ReplyDelete